Two weeks. One country. Under $100 a day. It sounds like a contradiction — Japan has a reputation as an expensive, gadget-and-neon kind of destination — but the math actually works if you build the trip around the right route, the right transport decisions, and a handful of habits that separate a $70 day from a $250 one.
This is the plan we’d actually run: Tokyo, a day trip to Hakone and Mount Fuji, Kyoto with a Nara day trip stitched in, Osaka, and a long day trip out to Hiroshima and Miyajima. It’s often called the “Golden Route” for a reason — it’s the highest-density path through Japan’s best-known sights, and it happens to also be the most budget-efficient one, if you know where to spend and where to hold back.
Below is the full 14-day itinerary, a real day-by-day cost breakdown (not just a headline number), and everything we’ve learned about keeping Japan affordable without making the trip feel like a compromise.
Japan Trip Quick Facts
Before the itinerary, the essentials in one place:
| Visa | Most passport holders (including the US, UK, EU, Australia, Canada) get a 90-day visa-free entry as tourists. Check your specific country’s requirement before booking, since this varies. |
| Currency | Japanese Yen (¥). Budget figures below use roughly ¥150 = $1 USD — recheck the live rate closer to your trip. |
| Language | Japanese. English signage is common in stations and tourist areas; translation apps cover the rest. |
| Tipping | Not expected, and can come across as awkward. Good service is the default, not something you pay extra for. |
| Cash or card | Japan is far more card-friendly than it used to be, but carry cash for small restaurants, shrines, rural stops, and some konbini purchases. |
| Water | Tap water is safe to drink everywhere. |
| Best for budget | Late April–May and early-to-mid autumn (shoulder season) beat cherry blossom and peak-foliage weeks on both price and crowds. |
| Vaccinations | None required for entry. |
Keep this list handy — we’ll go deeper on visas, cash strategy, and airports later in the Practical Prep section.
Is Two Weeks in Japan Enough?
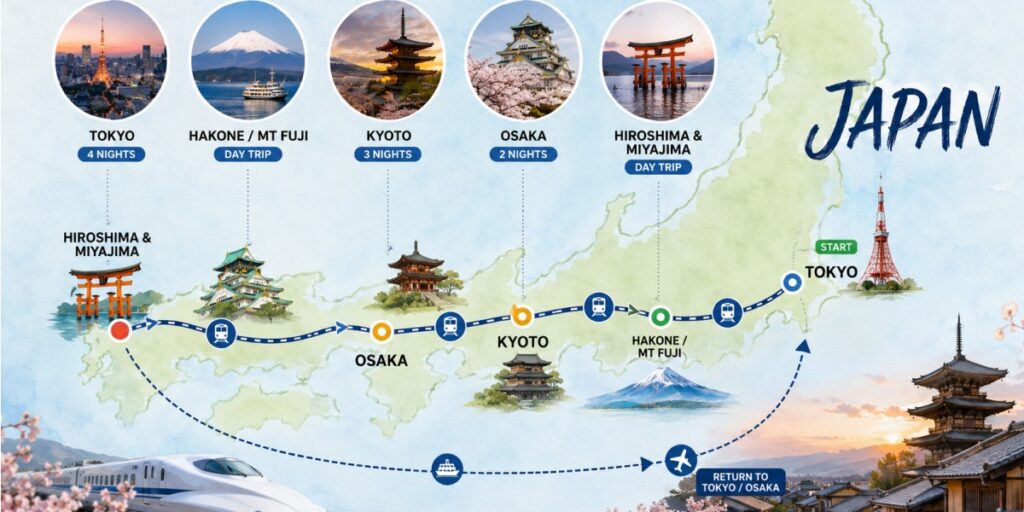
Yes — and for a first trip, it’s arguably the sweet spot. Two weeks is enough time to cover Tokyo properly, take a real day trip out to Mount Fuji country, spend several unhurried days in Kyoto, use Osaka as a food-and-nightlife base, and still reach Hiroshima without the trip turning into a checklist sprint.
Could you see more of Japan in two weeks? Sure — Japan rewards a slower pace, and there’s always a case for adding a region. But more destinations means more transit days, more advance-booked tickets, and more money spent moving between places instead of experiencing them. A good budget Japan travel plan chooses depth over a checklist: five bases, a manageable number of hotel changes, and enough breathing room that a rained-out afternoon doesn’t wreck the whole schedule.
Why This Route (and Not the Japanese Alps Loop)
If you’ve researched “2 week Japan itinerary” much at all, you’ve probably seen a different version of this trip — one that swaps Hakone and Hiroshima for a loop through Takayama, Shirakawa-go, Kanazawa, and the Tateyama Kurobe Alpine Route. It’s a genuinely beautiful route, and if you’ve already done the Golden Route once or you’ve got a bigger daily budget, it’s worth looking into.
For a first two-week trip on $100 a day, though, it doesn’t pencil out. The Alpine Route ticket alone runs around ¥12,360 (roughly $82) — nearly a full day’s entire budget before you’ve paid for a bed, a meal, or a single train beyond it. Add the connecting trains and buses to Takayama and Shirakawa-go, several of which run on limited daily schedules and need to be booked in advance, and you’re looking at four or five transit-heavy days that eat far more of your budget and your planning time than they give back in must-see value.
The Golden Route, by comparison, hits Japan’s highest-demand sights — Shibuya, Fushimi Inari, Kinkaku-ji, Miyajima, Osaka’s street food scene — with shorter, cheaper, more frequent transport connections between them, and almost none of the tickets require advance booking weeks out. That’s the trade we’re making on purpose: less alpine scenery, more budget headroom and fewer logistics to get wrong on a first trip.
If a mountain-and-craft-town loop is calling to you, it’s a great candidate for trip two — see our take on it in the FAQs below.
Best Time to Visit Japan (and What It Does to Your Budget)
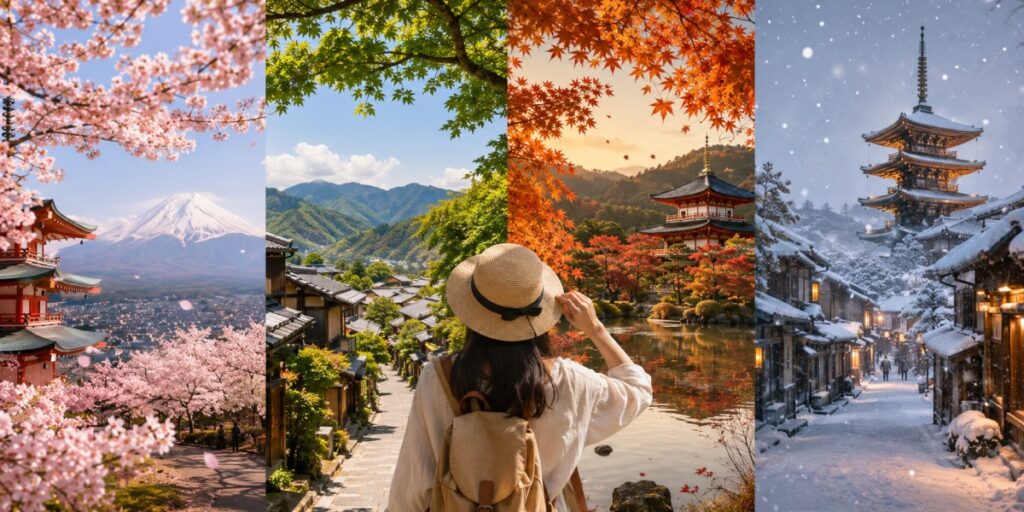
Cherry blossom season (late March–early April) and peak autumn foliage (mid-November) are the two weeks everyone wants. That demand shows up directly in flight and hotel prices, and it shows up in crowds at every major sight on this itinerary.
The shoulder months — late April into May, and early-to-mid autumn before the foliage peak — give you comfortable weather and noticeably lower prices without asking you to skip the good parts of the year. June brings the rainy season, which keeps prices low if you don’t mind a poncho. Winter is coldest but cheapest of all, and Kyoto’s quieter temples in December and January are underrated.
Two more budget levers, regardless of season: flying mid-week instead of over a weekend, and booking your flights and Kyoto accommodation one to two months out rather than at the last minute. Kyoto in particular sells out fast in peak season — book early.
Getting Around: JR Pass vs. Individual Train Tickets
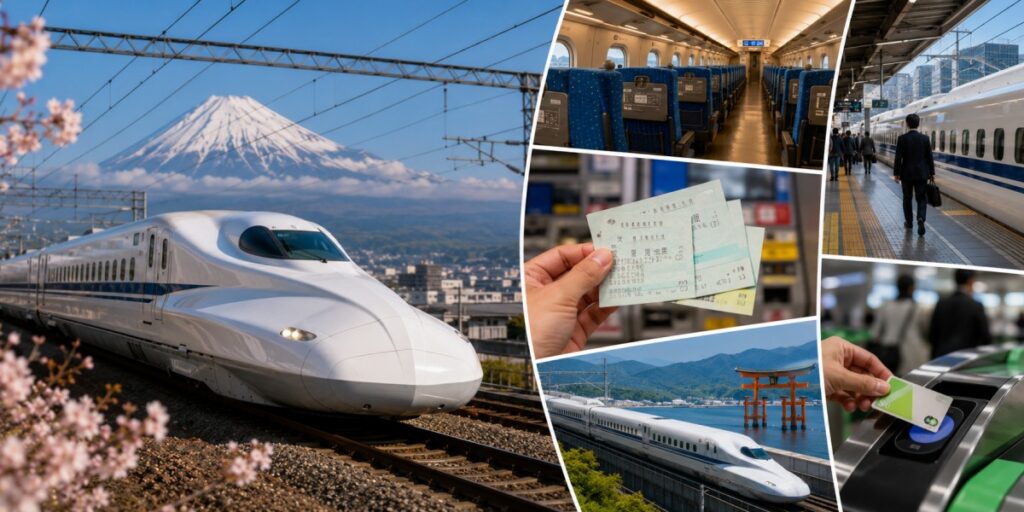
The Japan Rail Pass used to be an automatic yes for any multi-city Japan trip. It isn’t anymore, and running the numbers before you buy is the single highest-leverage budget decision on this whole trip.
Current JR Pass pricing (2026):
| Pass | Price |
| 14-day nationwide JR Pass | ¥80,000 (~$530) |
| 7-day nationwide JR Pass | ¥50,000 (~$330) |
| Overseas sales, from October 1, 2026 | ¥84,000 for the 14-day pass |
What the Golden Route actually costs in individual tickets: Tokyo–Kyoto (Shinkansen, ~¥13,320), Kyoto/Osaka–Hiroshima round trip (roughly ¥11,000 each way), plus the return leg back toward your departure city — the major intercity hops on this route add up to somewhere around ¥40,000–50,000 (~$270–330) total, not ¥80,000.
That’s the rule of thumb worth remembering: on the classic Golden Route, buying individual tickets is almost always cheaper than the pass, because this route simply doesn’t involve enough long-haul train travel to make the pass pay for itself. The JR Pass earns its price back on itineraries with more long-distance criss-crossing — Tokyo to Hokkaido, or several Shinkansen legs in a single week. If you added the Alps loop discussed above, the math might tip back in the pass’s favor; for this itinerary, it doesn’t.
Local transport: Load a Suica or PASMO IC card at any station machine or airport counter — both work interchangeably on trains, subways, buses, and at konbini registers nationwide, so it genuinely doesn’t matter which one you get. You can also add Suica directly to Apple Wallet before you land and top it up from your phone. Local transport runs roughly ¥800–1,500 ($5–10) a day; a one-day transit pass in cities like Kyoto can beat paying per ride if you’re moving around a lot.
Where to Stay on a Budget (by City)
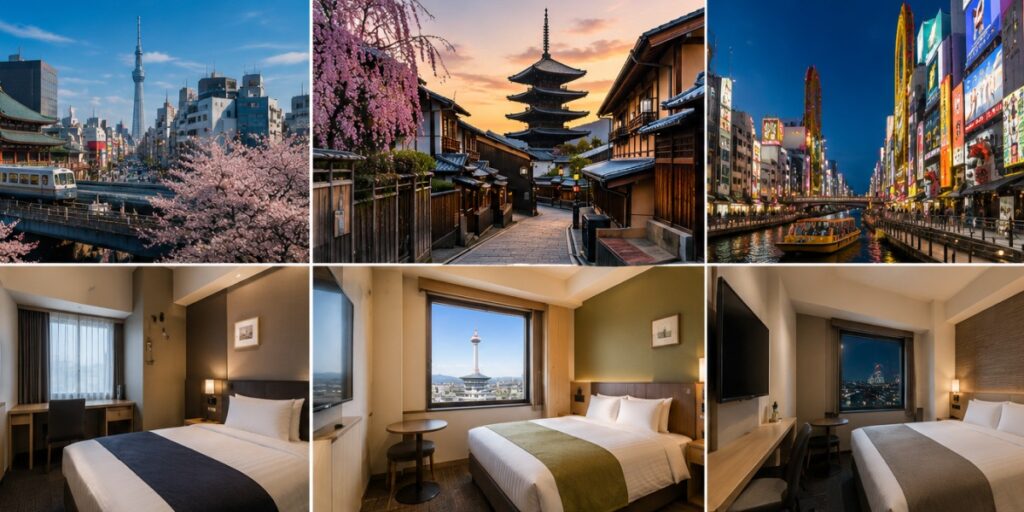
You don’t need to hop hotels every night to save money — in fact, changing accommodation less often saves both cash and energy. Book a few nights in each base instead: this itinerary only asks you to check into a new place two or three times across the whole two weeks.
- Tokyo: Stay near the Yamanote Line loop — it connects almost everywhere you’ll want to go without adding transfer time or cost. Hostel dorms run roughly ¥3,500–5,000 ($23–33) a night; a business hotel double runs ¥7,000–10,000 ($47–67).
- Kyoto: Similar pricing bands to Tokyo. Book early — Kyoto is the city on this route most likely to sell out in peak season.
- Osaka: Same range again, and Osaka tends to offer some of the best value-for-location on the whole trip given its central position and nightlife access.
Business hotel chains and capsule hotels are worth searching by name in each city if hostels aren’t your style — they routinely undercut Western-style hotels of similar quality.
The 14-Day Japan Itinerary: Day by Day
Days 1–4: Tokyo
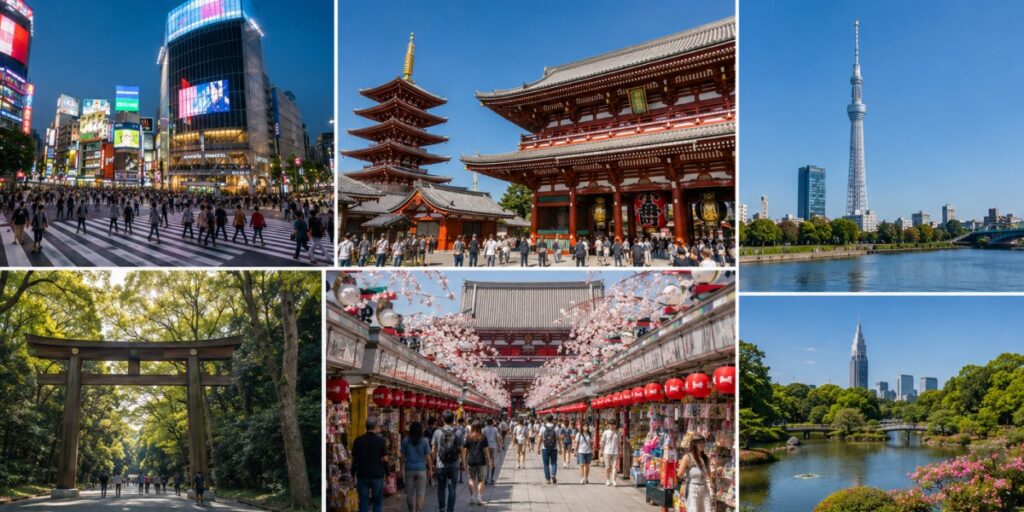
Day 1 — Arrival and easing in. Land, get your IC card sorted, and don’t over-plan the first evening. Shibuya Crossing after dark and a konbini dinner is honestly the right way to start — low effort, high impact, zero pressure while you adjust to jet lag.
Day 2 — East Tokyo. Sensoji Temple and Nakamise shopping street in Asakusa, a walk through Ueno Park, and Tokyo Skytree if you want the view (entry runs ¥2,000+; the park and temple grounds around it are free).
Day 3 — West Tokyo. Meiji Shrine, Harajuku’s Takeshita Street for people-watching and snacks, and Shinjuku Gyoen (¥500) for a genuinely peaceful break from the crowds.
Day 4 — Your pick. teamLab’s digital art spaces, Akihabara for electronics and arcades, or Shimokitazawa’s thrift shops and quieter cafés. This is a flex day — use it for whichever Tokyo neighborhood matches your interests, or simply to slow down.
Day 5: Hakone & Mount Fuji (Day Trip)
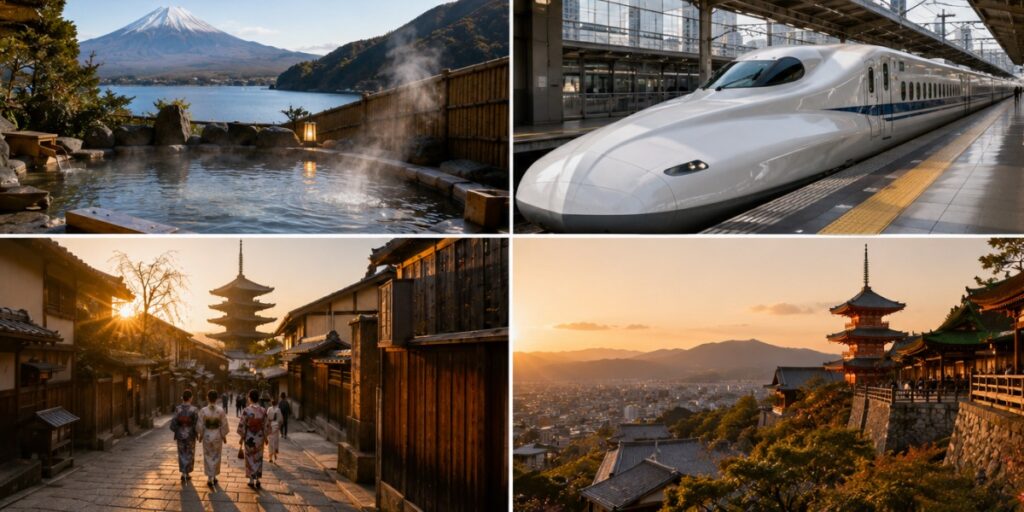
A full day out to onsen country: the Hakone Ropeway, the sulfur vents at Owakudani, and — weather depending — views of Mount Fuji. Fuji is famously shy about showing up on cue, so temper your expectations and treat a clear view as a bonus rather than a guarantee. The Hakone Free Pass bundles most of the local transport and a few attractions into one ticket, which is worth pricing against paying individually.
Day 6: Travel to Kyoto
Shinkansen to Kyoto, then ease into the city with an evening walk through the Higashiyama lanes toward Kiyomizu-dera — you don’t need to pay for entry to enjoy the streets leading up to it.
Days 7–9: Kyoto (with a Nara Day Trip)
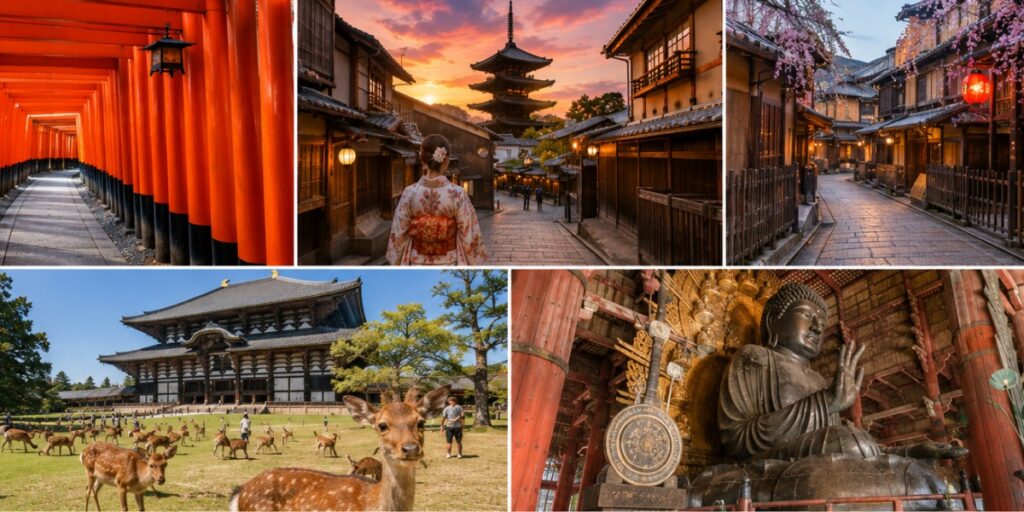
Day 7 — Southern and eastern Kyoto. Fushimi Inari Taisha (free, and best early or late to dodge the crowds) and a wander through Gion, Kyoto’s historic geisha district.
Day 8 — Nara day trip. Nara Park is free and full of famously bold, bowing deer; Todaiji Temple’s Great Buddha hall charges a small entry fee that’s genuinely worth it. This is one of the best cost-to-experience ratios on the whole trip.
Day 9 — Arashiyama and the northwest. The Arashiyama Bamboo Grove is free to walk through, though it’s worth knowing it’s also one of the most crowded free attractions in Japan — if you’d rather trade a little fame for a lot more quiet, Kodai-ji Temple’s smaller bamboo grove nearby gets a fraction of the foot traffic for a modest entry fee. Round out the day with a ride along the Katsura River and Kinkaku-ji, the Golden Pavilion (¥500) — a bike rental is a cheap, pleasant way to cover the distance between sights.
Days 10–11: Osaka
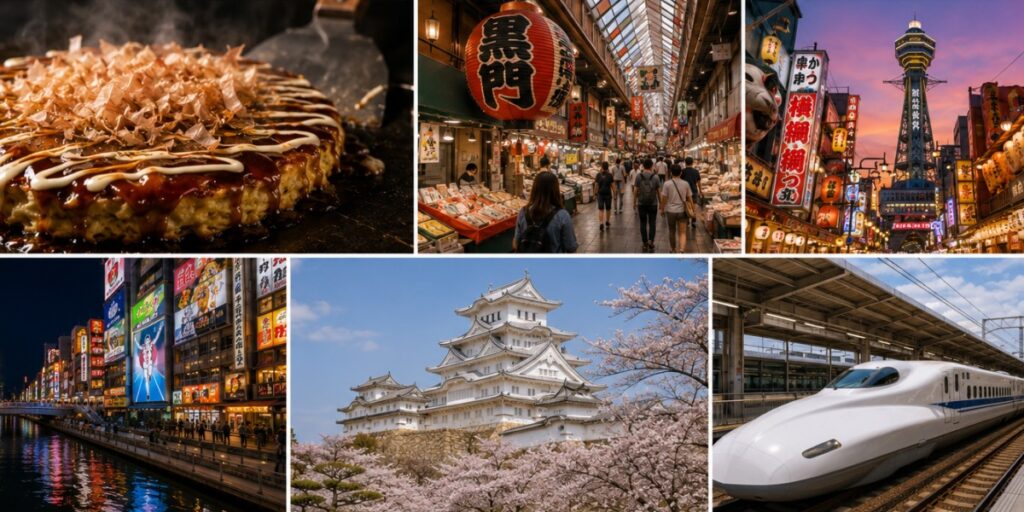
Day 10 — Travel and street food. Settle into Osaka, then head straight for Dotonbori. Takoyaki and okonomiyaki here are cheap, filling, and honestly close to the entire reason to visit — the trick is to walk two streets back from the tourist-facing stalls to wherever the office workers are actually lining up. Osaka Castle’s grounds are free to roam even if you skip the paid interior.
Day 11 — Explore, or day trip. Kuromon Market and the retro Shinsekai neighborhood for a lower-key Osaka day, or an optional day trip out to Himeji Castle if you want one more castle on the list.
Day 12: Hiroshima & Miyajima (Day Trip)
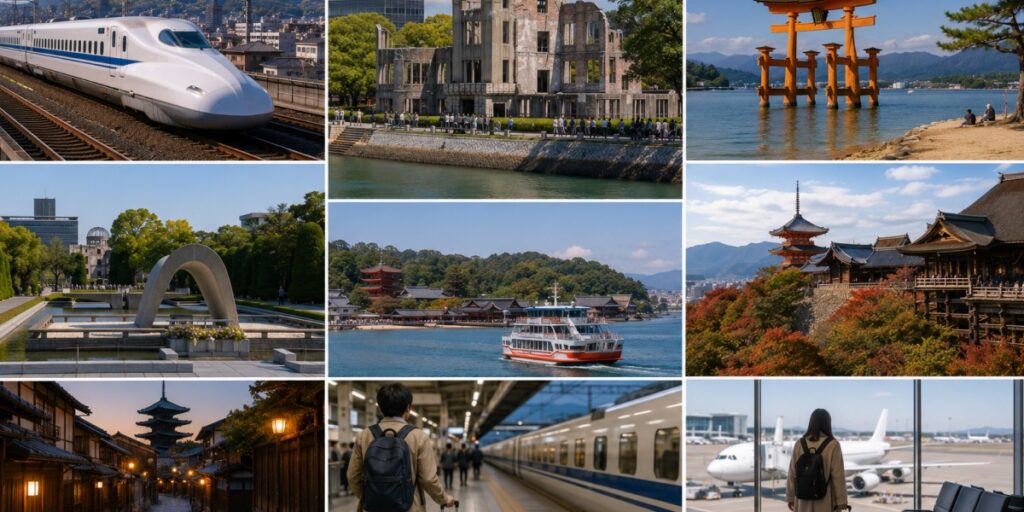
A long day, and an unforgettable one. An early Shinkansen gets you to Hiroshima’s Peace Memorial Park and Peace Memorial Museum (a small donation is customary), then a short ferry ride out to Miyajima for the floating torii gate — one of the most photographed sights in the country and, at low tide, one you can walk right up to for free.
Day 13: Buffer Day / Return
Build in slack here. Weather delays, an extra Tokyo neighborhood you didn’t get to, laundry, repacking — a trip this dense benefits from one day with no fixed plan.
Day 14: Departure
Keep this day light. Confirm your route to the airport in advance so a transit hiccup doesn’t turn into a missed flight.
What Two Weeks in Japan Actually Costs
Here’s the real breakdown — not a single headline number, but what each category actually costs per day and across the full trip.
| Category | Per day (¥) | Per day ($) | 14-day total ($) |
|---|---|---|---|
| Accommodation | ¥3,500–5,500 | $23–37 | $325–520 |
| Food | ¥2,500–3,500 | $17–23 | $235–325 |
| Local Transport | ¥800–1,500 | $5–10 | $75–140 |
| Attractions | ¥500–1,500 | $3–10 | $45–140 |
| Intercity Trains | ¥2,100–3,200 | $14–21 | $195–300 |
| Connectivity (eSIM) | ¥440–450 | $2.96 | $41.40 |
| Daily Total | ¥9,840–15,650 | $65.96–103.96 | ~$916–1,466 |
That lands the trip at roughly $70–$100 a day before international flights — call it $875–$1,400 for the full 14 days, depending on how you travel within those ranges. Exchange rate assumed here is ~¥150 to $1; recheck the live rate before you budget your own trip.
The $70/Day Version: What Changes
The table above is a range, not a single number — and the low end of that range is a genuinely achievable $70/day trip, not a theoretical one. Here’s what shifts if you’re optimizing hard:
| Category | $100/Day Version | $70/Day Version | What Changes |
| Accommodation | Business hotel doubles (~$47–67) | Hostel dorms (~$23–33) | Private rooms → shared dorms |
| Food | Mix of konbini, ramen shops, market stalls (~$17–23) | Konbini-first, fewer sit-down meals (~$15–18) | One fewer restaurant meal a day |
| Attractions | A few paid entries most days (~$3–10) | Lean on free temples, parks, and viewpoints (~$2–5) | Prioritize free sights; skip 1–2 optional paid ones |
| Intercity Trains | Same (~$14–21) | Same | This cost doesn’t compress much — it’s largely fixed by the route |
| Connectivity | Same (~$2.96) | Same | Already the cheapest line item on the trip |
| Daily Total | ~$96–104 | ~$68–75 |
The route, the cities, and the number of days in each stay identical — the $70/day version isn’t a shorter or thinner trip, it’s the same itinerary with accommodation and food dialed down. If you’re traveling solo and can split a dorm bed, or you’re happy eating konbini breakfasts and lunches with one real meal a day, $70 is realistic without cutting a single stop from this itinerary.
What We’d Cut to Stay Under $100/Day
Every itinerary you’ll find for this route includes optional extras — food tours, tea ceremonies, sumo shows, geisha dinners, observation decks stacked three to a city. They’re not bad experiences. They’re just not $100/day experiences, and it’s worth being upfront about what we’d skip and why.
- Paid food tours and guided tastings. Dotonbori and Kuromon Market are built for wandering and grazing on your own — a guided tour adds $50–100+ for context you can get for free just by walking slowly and reading a translation app.
- Multiple paid observation decks. Tokyo Skytree, Umeda Sky Building, Harukas 300 — pick one, not all three. The Tokyo Metropolitan Government Building’s observation deck is free and gives you a comparable skyline view.
- Themed dinner experiences (ninja restaurants, samurai shows, geisha dinner packages). Memorable, but each one can run $50–150+ per person — roughly a full day’s budget for one evening.
- A second onsen town or ryokan splurge night. One night in Hakone covers the experience; a dedicated ryokan stay with kaiseki dinner is wonderful but sits closer to $150–300 a night, which is a different trip than this one.
- Buying the JR Pass “just in case.” As covered above, it’s simply the wrong purchase for this specific route — this is the single biggest line-item mistake we see budget travelers make on the Golden Route.
None of this means skip fun — it means spend deliberately. Put the money you save here toward one thing that matters to you, whether that’s a nicer hotel night, a proper sushi dinner, or just a bigger buffer for souvenirs.
Free (and Nearly Free) Things to Do on This Route
A surprising amount of this itinerary costs nothing at all. Worth keeping this list handy:
| City | Free or Nearly Free |
| Tokyo | Shibuya Crossing, Meiji Shrine, Sensoji Temple grounds, Ueno Park, Tokyo Metropolitan Government Building observation deck |
| Kyoto | Fushimi Inari Taisha, Arashiyama Bamboo Grove, Higashiyama lane walks, Kyoto Imperial Palace grounds |
| Nara | Nara Park and its deer (free; Todaiji’s Great Buddha hall is a small paid entry) |
| Osaka | Osaka Castle grounds, Dotonbori canal walk, Kuromon Market (browsing) |
| Hiroshima/Miyajima | Peace Memorial Park, the floating torii gate at low tide |
Between these and the ¥500-range entries (Shinjuku Gyoen, Kinkaku-ji), you can fill most of a day on this route without touching your attractions budget at all.
Hidden Costs to Watch For
The line items above cover the obvious spending. These are the ones that quietly add up if you’re not watching for them:
- Dynamic currency conversion at ATMs and card terminals. When a machine or register asks “charge in USD or JPY?” — always choose yen. Paying in your home currency routes the conversion through the merchant’s bank at a worse rate than your own card issuer would give you.
- Luggage forwarding services (like Takkyubin) are convenient for moving bags between hotels without carrying them, but run roughly $15–20 per bag per hop. Skip it on this route — you’re only changing accommodation two or three times, and each change is a manageable train ride, not a multi-city trek.
- Paid observation decks and “one more attraction” creep — see the previous section.
- Coin lockers at stations for day-trip luggage storage are cheap individually (¥300–700) but add up if you’re using them daily; a day pack you carry with you avoids the fee entirely.
- SIM/data overage if you’re on a roaming plan instead of a dedicated travel eSIM — see the connectivity section below.
- 2026 tax-free shopping changes. Japan is shifting its tourist tax-free system from an instant discount at checkout to a pay-now, refund-at-the-airport model. Budget the full price at the register and factor the refund in separately rather than assuming a discount on the spot.
Staying Connected: The Smart, Low, Cost Way to Stay Online
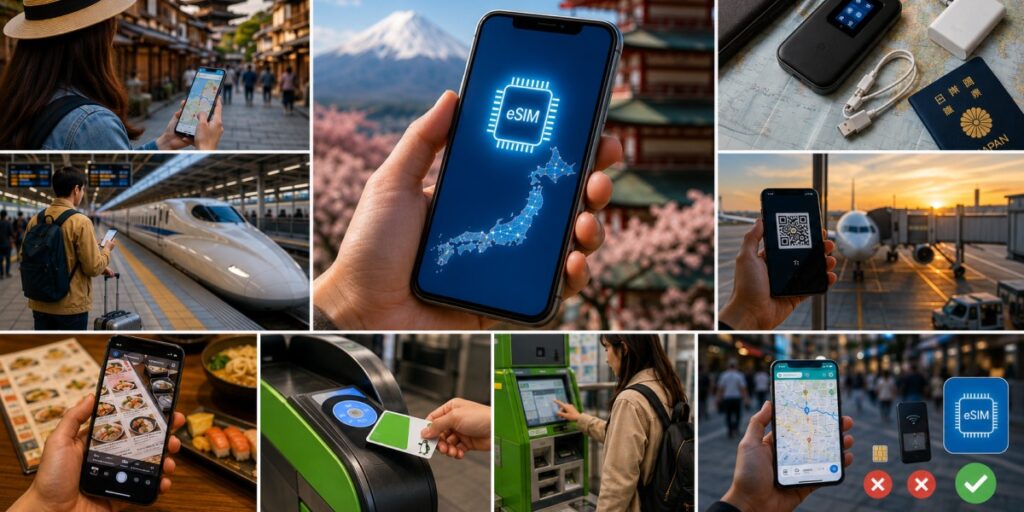
Every day of this itinerary leans on your phone — train times, maps, restaurant menus, translation. A local data plan isn’t optional, it’s part of the budget, and it’s also one of the cheapest line items on the whole trip.
An Airhub Japan eSIM averages out to roughly ¥440–450 a day (about $2.96), or around $41.40 for the full 14 days — instant setup before you even land, local network speeds, and no hunting for a physical SIM counter with your luggage. Because it’s an eSIM, you can keep your home number active on your phone’s second slot for banking apps and two-factor authentication while your data runs on the Japan plan, and the same Airhub app covers 190+ other countries if Japan turns into the first stop of a longer trip.
Just confirm your phone supports eSIM and dual SIM before you go, install the plan before you fly, and activate it as soon as you land — you’ll have maps and messaging working before you’re even off the platform. The alternatives (a physical prepaid SIM, or a pocket WiFi router you have to carry, charge, and return) work too, but they add friction an eSIM simply skips.
Budget Food & Transport Hacks That Actually Work
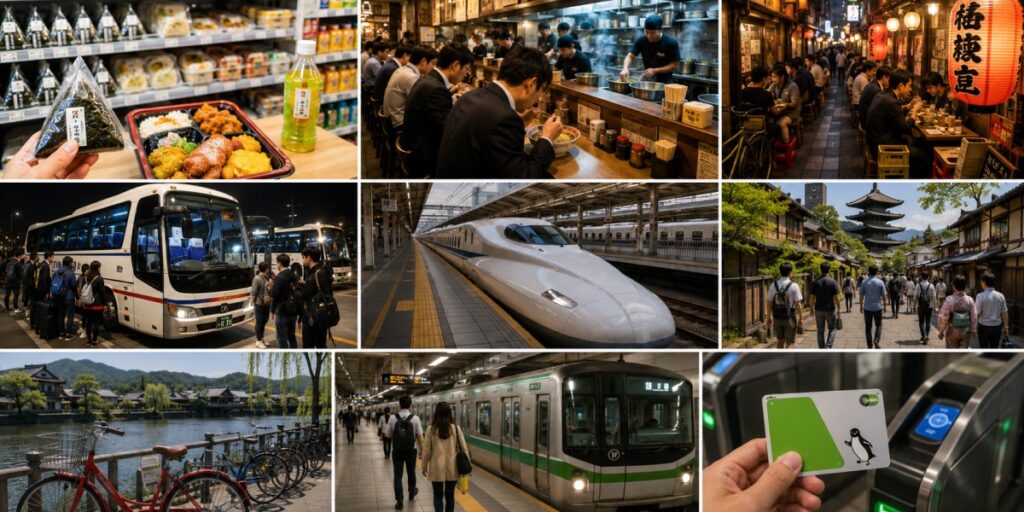
- Food: Konbini — 7-Eleven, FamilyMart, and Lawson alike — is your single biggest budget lever. A breakfast built entirely from a konbini run (onigiri, a boiled egg, coffee) can come in under ¥500 and saves more over 14 days than any other single habit on this list. For sit-down meals, ramen and gyudon bowls run ¥800–1,200 and are filling enough to double as lunch and an early dinner if you’re stretching a day. Standing-counter noodle shops near train stations are some of the fastest, cheapest hot meals in the country.
- Transport: Load your IC card generously at the start and top it up as you go rather than running it to zero and holding up a gate line. For any day with more than three or four rides, price out a one-day transit pass before you start tapping in — it often beats paying per ride. And for the Osaka–Hiroshima or Kyoto–Osaka legs specifically, an overnight highway bus runs well under half the Shinkansen fare if you’re not in a hurry and don’t mind a night bus over a night in a hotel.
- Booking: Open-jaw flights — flying into Tokyo and out of Osaka or Hiroshima, or vice versa — are worth pricing when you book. They can eliminate a return leg entirely and often cost about the same as a round trip into and out of the same city.
Practical Prep: IC Cards, Cash, and 2026 Changes
Visa & Entry
Most travelers — including from the US, UK, EU, Australia, and Canada — receive a 90-day visa-free tourist entry into Japan. Requirements vary by passport, so confirm yours specifically before booking, and consider filing Japan’s digital arrival form (Visit Japan Web, at services.digital.go.jp/en/visit-japan-web) before you fly — it’s free, takes a few minutes, and lets you skip the paper immigration and customs forms at the airport.
Narita vs. Haneda
Both airports serve Tokyo, but they’re not equivalent for a budget trip. Haneda sits closer to central Tokyo — a shorter, cheaper ride into the city on arrival, which matters after a long-haul flight. Narita is farther out, but the Keisei Skyliner or a limited express line into the city is noticeably cheaper than the Narita Express if you’re not in a rush; either way, check both airports when you’re pricing flights, since the fare difference can outweigh the extra transit time on Narita.
IC Cards, Cash & Avoiding Conversion Fees
Suica and PASMO are interchangeable for visitors — get whichever one is available at your arrival airport and use it everywhere: trains, buses, konbini, vending machines. You can add Suica to Apple Wallet before you land and top it up from your phone using your eSIM data connection, skipping the machine line entirely.
Japan is more card-friendly than its reputation suggests, but keep cash on hand for small restaurants, shrines, rural stops, and the odd konbini terminal that’s card-only-adjacent but glitchy with foreign cards. For cash, withdraw from 7-Eleven, FamilyMart, or Lawson ATMs — they’re reliable, widely available, and typically charge lower fees than other options for foreign cards. When an ATM or card terminal asks you to choose a currency, always select yen, not your home currency — see the Hidden Costs section above for why.
Visit Japan Web (Skip the Arrival Lines)
Covered above under visa prep, but worth repeating here since it’s genuinely one of the highest-value, zero-cost things you can do before this trip: fill out Japan’s digital arrival form in advance and you’ll clear immigration and customs noticeably faster after a long flight, with no fee and about ten minutes of effort.
Final Word Before You Go
The first time we ran this route — Tokyo, then Kyoto, then Osaka, with a couple of day trips stitched in — the trip came in under what plenty of people spend on a long weekend in Europe. Japan’s reputation as an expensive destination is mostly a reputation about how people choose to travel it: taxis instead of trains, hotel restaurants instead of konbini, the JR Pass bought out of habit instead of arithmetic. Make different choices in those few spots and the country opens up at a price that genuinely fits a $70–$100 daily budget.
Book Kyoto early, keep your hotel changes to two or three across the whole trip, lean on free temples and parks between the paid highlights, and let the konbini carry more of your food budget than you’d expect. That’s the whole system — everything else in this guide is just the specifics of applying it to fourteen days on the Golden Route.
FAQs
1. Can you really do Japan on $100 a day?
Yes — the daily budget table above shows exactly how, category by category, and it’s not a theoretical minimum. It assumes business-hotel-level accommodation, a mix of konbini and casual restaurant meals, and individual train tickets instead of a JR Pass. Push further toward hostels and konbini-first eating and $70/day is realistic too (see the $70/Day Version section above).
2. Is two weeks enough time in Japan?
Yes, especially for a first trip. Fourteen days is enough to properly cover Tokyo, Kyoto, and Osaka with day trips to Hakone/Fuji, Nara, and Hiroshima/Miyajima woven in, without turning the trip into a checklist sprint between cities.
3. How many days should I spend in Tokyo?
Four is the sweet spot for a first visit — enough to cover east and west Tokyo properly plus one flexible day, without eating too far into your time in Kyoto and Osaka.
4. Is the JR Pass worth it for a 2-week trip?
Usually not, for this specific route. The 14-day pass runs about ¥80,000 (~$530, rising to ¥84,000 for overseas buyers from October 2026), while individual tickets for the Golden Route’s major hops add up to roughly ¥40,000–50,000. The pass earns its cost back on itineraries with more long-distance train travel than this one has — do the math on your specific route before buying.
5. Do I need a visa to visit Japan?
Most travelers, including from the US, UK, EU, Australia, and Canada, get a 90-day visa-free tourist entry. Requirements differ by passport, so confirm yours specifically, and consider filing Japan’s Visit Japan Web arrival form in advance to speed up entry.
6. Should I fly into Narita or Haneda?
Haneda is closer to central Tokyo and generally the more convenient choice after a long flight. Narita is farther out but sometimes cheaper to fly into, with the Keisei Skyliner offering an affordable way into the city — compare both when pricing flights, since the fare gap can outweigh the extra transit time.
7. How do I avoid high roaming charges in Japan?
Skip your home carrier’s roaming plan and install a Japan-specific eSIM (like Airhub’s) before you fly. It runs about $3 a day, activates the moment you land, and keeps your regular number free for calls and two-factor authentication on a dual-SIM phone.
8. Is tipping expected in Japan?
No. Tipping isn’t part of Japanese etiquette, and leaving extra cash can genuinely confuse or embarrass staff. Excellent service is simply the standard — a sincere thank you is all that’s expected.
9. Should I book hotels and trains in advance?
Yes, especially Kyoto accommodation, which sells out fastest in peak season. Book flights and hotels one to two months out rather than last-minute, and consider open-jaw flights (into Tokyo, out of Osaka or Hiroshima, or vice versa) to save a return leg.
10. What should I skip to save money on a 2-week Japan itinerary?
Paid food tours, multiple stacked observation decks, themed dinner experiences (ninja restaurants, geisha dinner packages), a second onsen/ryokan splurge night, and — for this specific route — the JR Pass. See the full breakdown in “What We’d Cut to Stay Under $100/Day” above.
Leave a Reply